If it’s not on Maven Central, it doesn’t exist!
Having a library not on Maven Central or at least on Bintray is not state of the art. I mean, we are in 2016 and most of the developers would like to use Maven, Gradle or other modern build systems for resolving library dependencies against artifact repositories automatically.
However, the challenge is not only to get a library into these repositories anyhow, but to get them in automatically through a continuous integration process.
I took the opportunity to set up such a process for a standardization organization, members of which are maintaining a reference implementation of a standard widely used in a whole industry.
The setup is not very complex, but nowhere I had found it written down at once. So I will do it here for all others who need a similar solution, hoping it is valuable for them. And, I do it also as documentation for the members of this committee.
Tools and Services
I will use the following cloud services and tools:
- Github.com for source code hosting and release control
- Travis-CI.org for running compilation, tests, and library publishing
- Bintray.com for repository hosting and publishing to Maven Central
- Gradle as build system tool
- Stefan Oehme’s sobula Gradle plug-in for releasing to Bintray
In fact, Stefan’s article was my starting point for this work and his Gradle plug-in the most helpful tool as releasing to Bintray trough their HTTP service API is the main challenge in this whole process. Thanks to his work resulting in his plug-in, I can implement the process without real programming efforts.
This article shows my experiences to set up a CI process for an organization. To set it up for a single developer is very similar and less complicated. I have it also done (before) for my own libraries.
GitHub
The first step is to setup an organization after having logged in to GitHub (a GitHub account is needed for that, of course). Goto your profile page and click the Organization menu entry on the menu shown under Personal settings. There will appear a (may be empty) list of already created organizations. On the right upper corner there will be a button for creating a new organization.
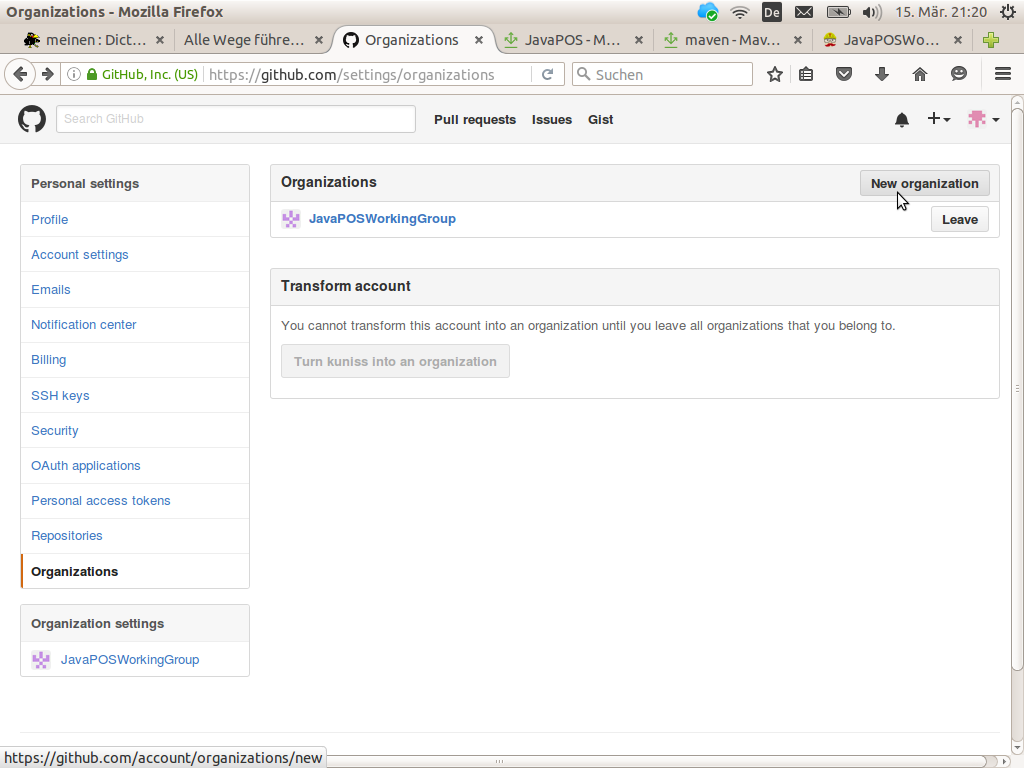
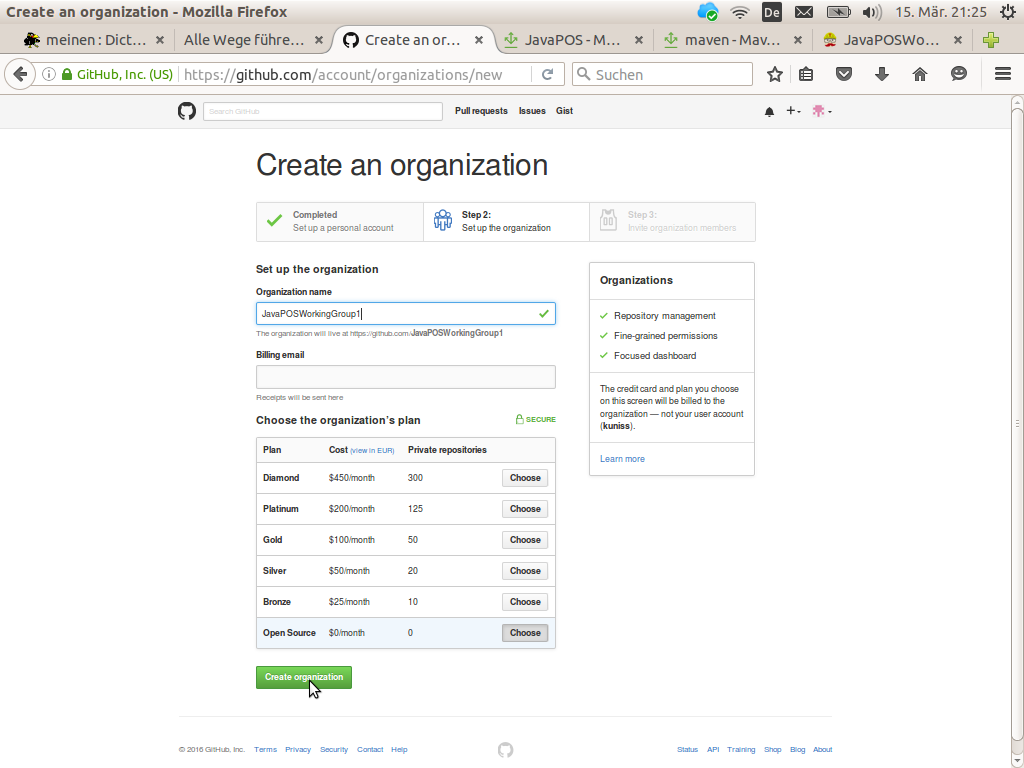
Pushing this button will ask you for the organization’s name and a billing plan.
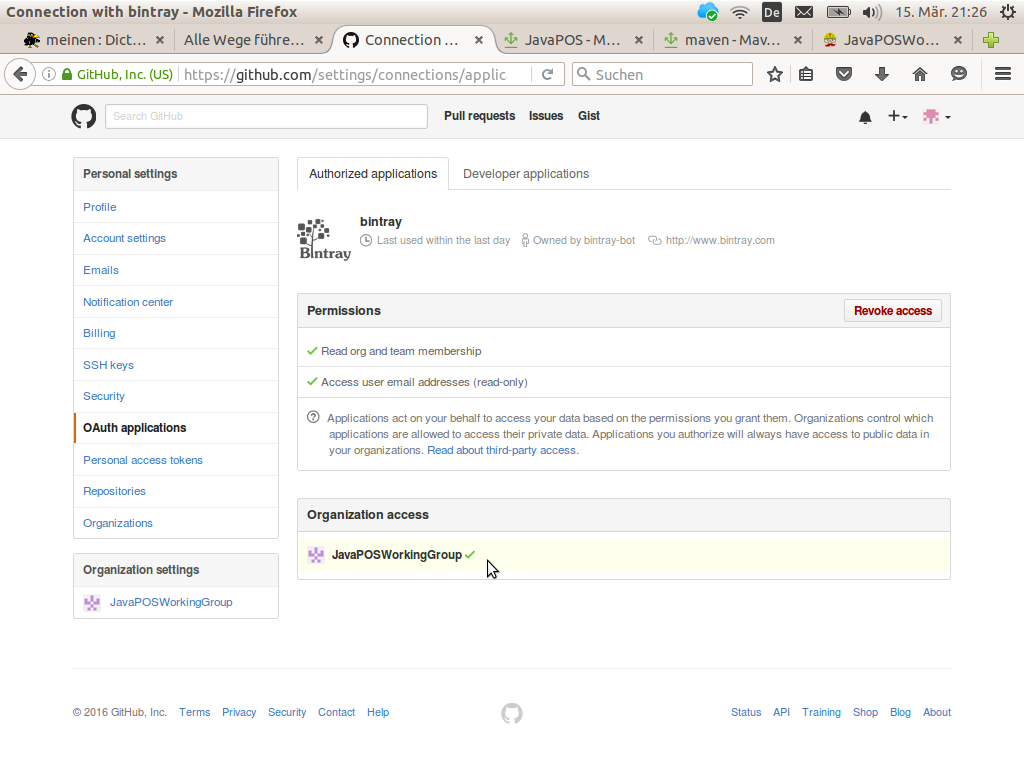
As we are planning to utilize Travis-CI.org and Bintray we must give them access to our GitHub organization’s account. This may be done on the OAuth applications dialog in the personal settings.
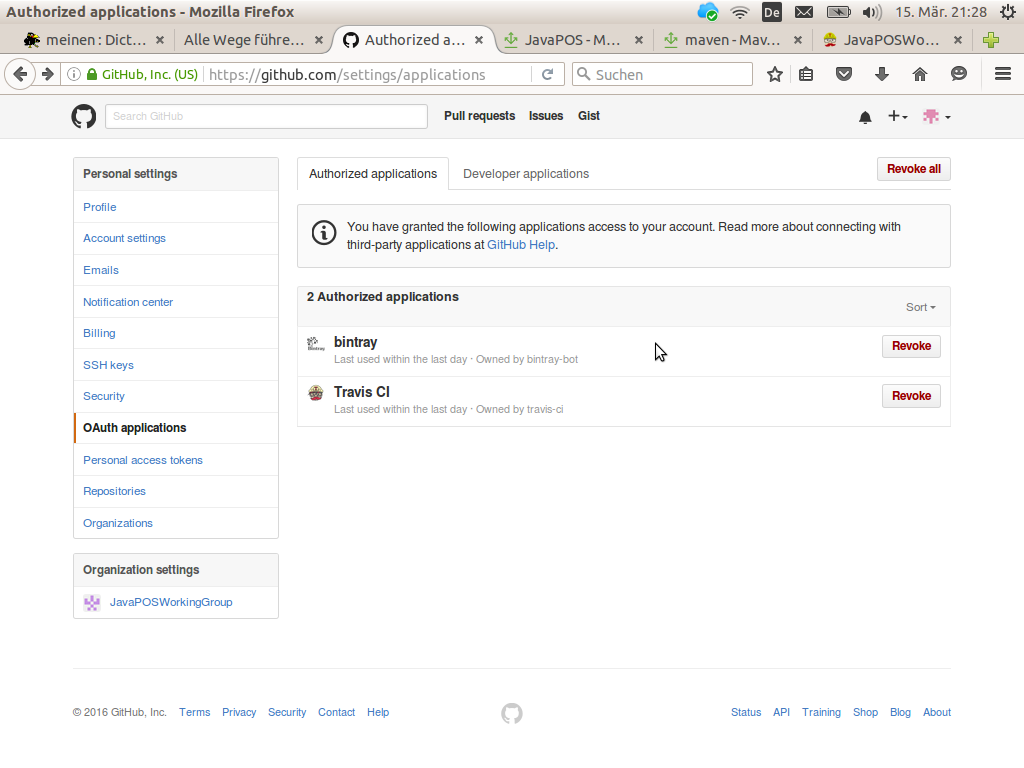
To get the third party applications displayed it may be necessary to create accounts on Travis-CI.org and Bintray. You may log in there trough your GitHub account; look for appropriate GitHub icons on the the side’s login pages.
After that, click on the bintray and Travis CI links on that page. Check on the subsequent dialog that the particular application is allowed to access your organization. If not, push the appropriate button right from your organization on this page.
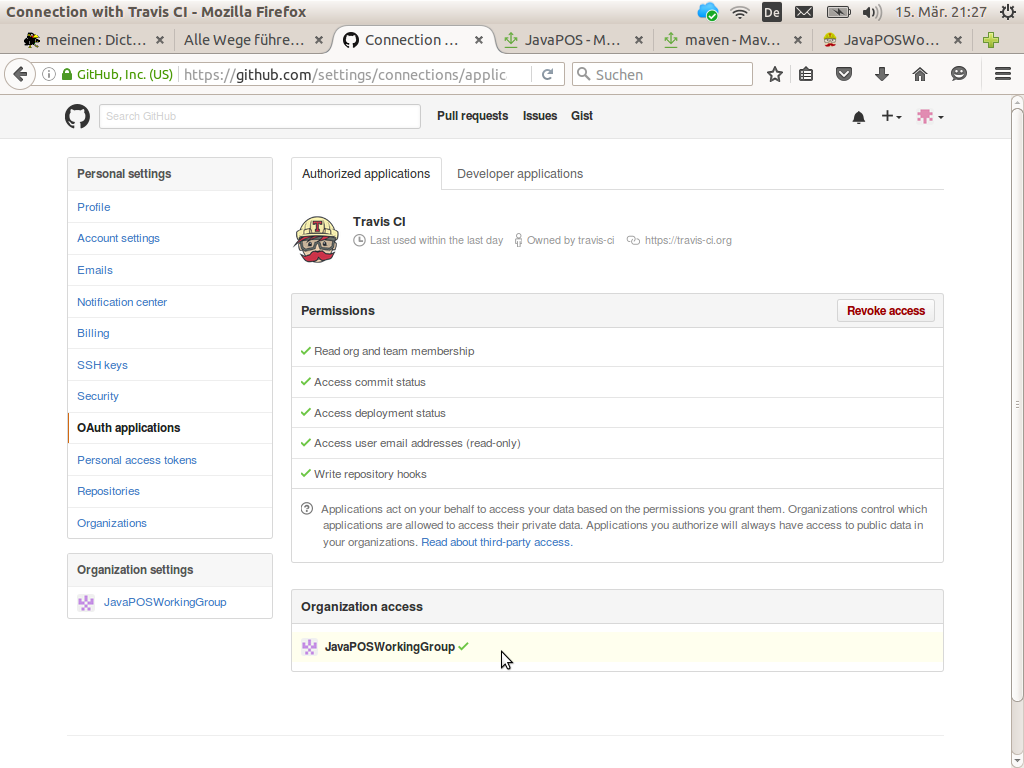
Do the same for the second application, here Bintray.
Now all is prepared for setting up source code repositories for your organization. I had set up 5 repositories for the committee reference implementation.
Bintray
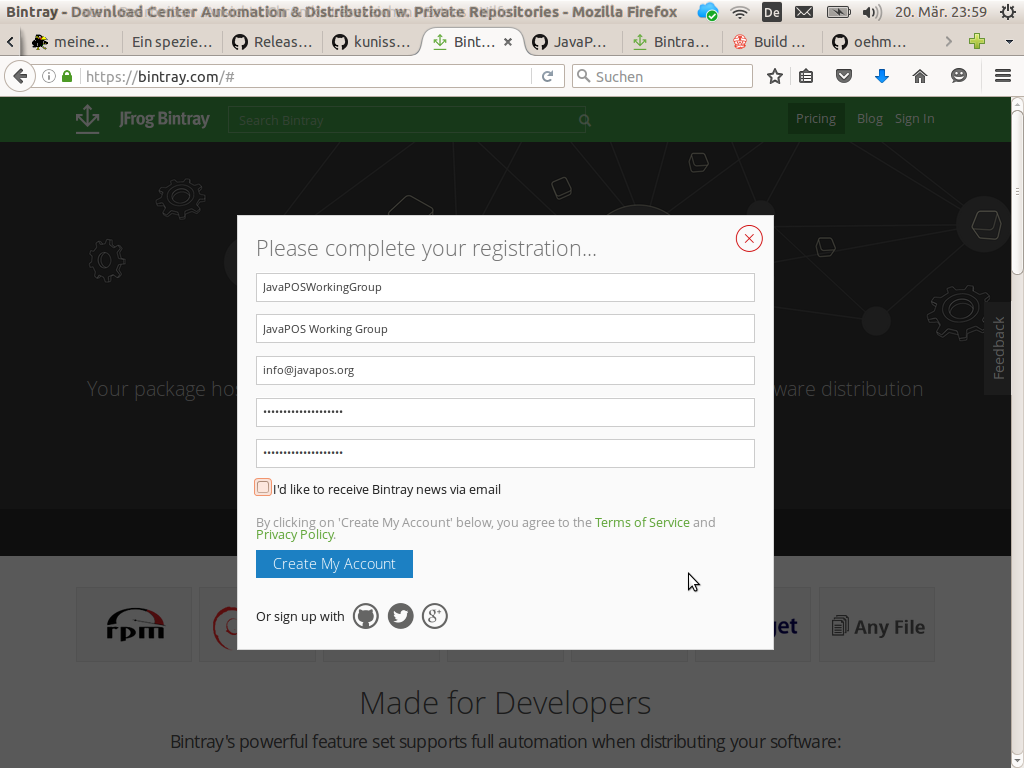
The GitHub integration on Bintray is done quite well. An organization would be visible on your’s users profile page. Unfortunately, either Stefan Oehme’s Gradle Bintray publishing plugin or Bintray’s service API itself is not able to handle an automatic publishing for organizations. However, for ordinary users it works well. Therefore, I have registered an own generic user for the organization. Its account will host the libraries we want to publish.
For an automatic publishing several other preconditions must be met on Bintray. At first, we need a Bintray API key. This key is used like a password to authorize Bintray API calls from the Travic CI service. This API key may be generated at the Bintray user profile when clicking on the API Key menu.
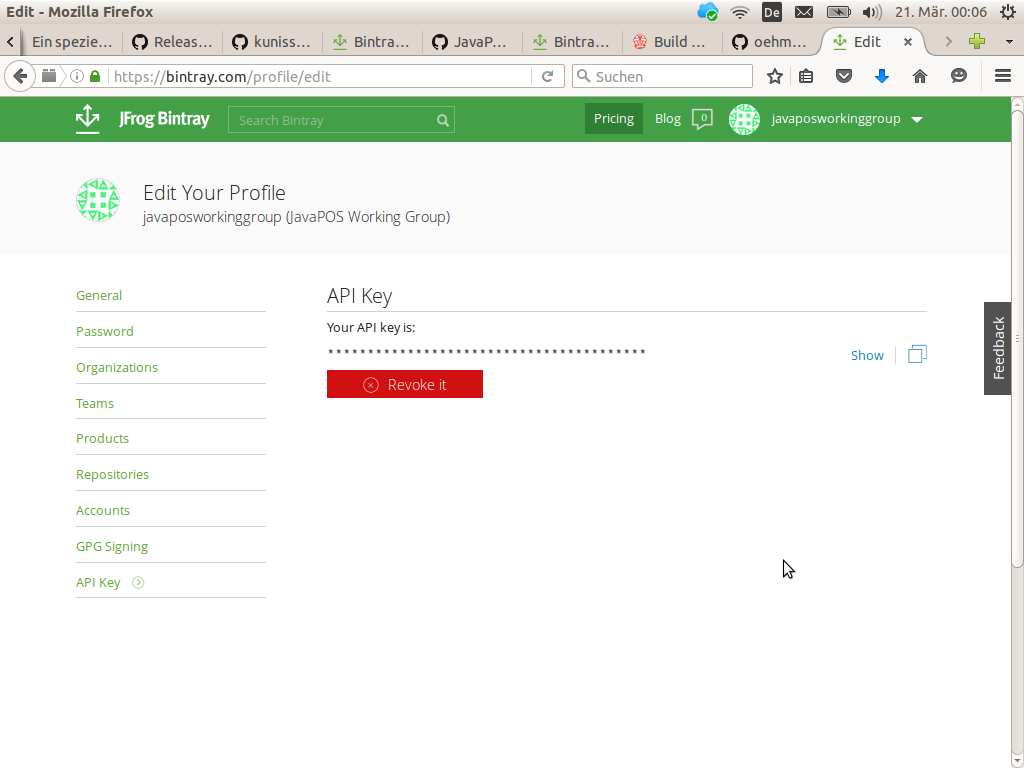
This key will later be copied to the project’s Travis CI configuration dialogs. However, that’s not all. For publishing to Maven Central from Bintray all Java libraries must be digitally signed. Bintray supports signing of published libraries trough their service APIs. However, the cryptographic key pair for that must be stored at Bintray.
GPG Keys
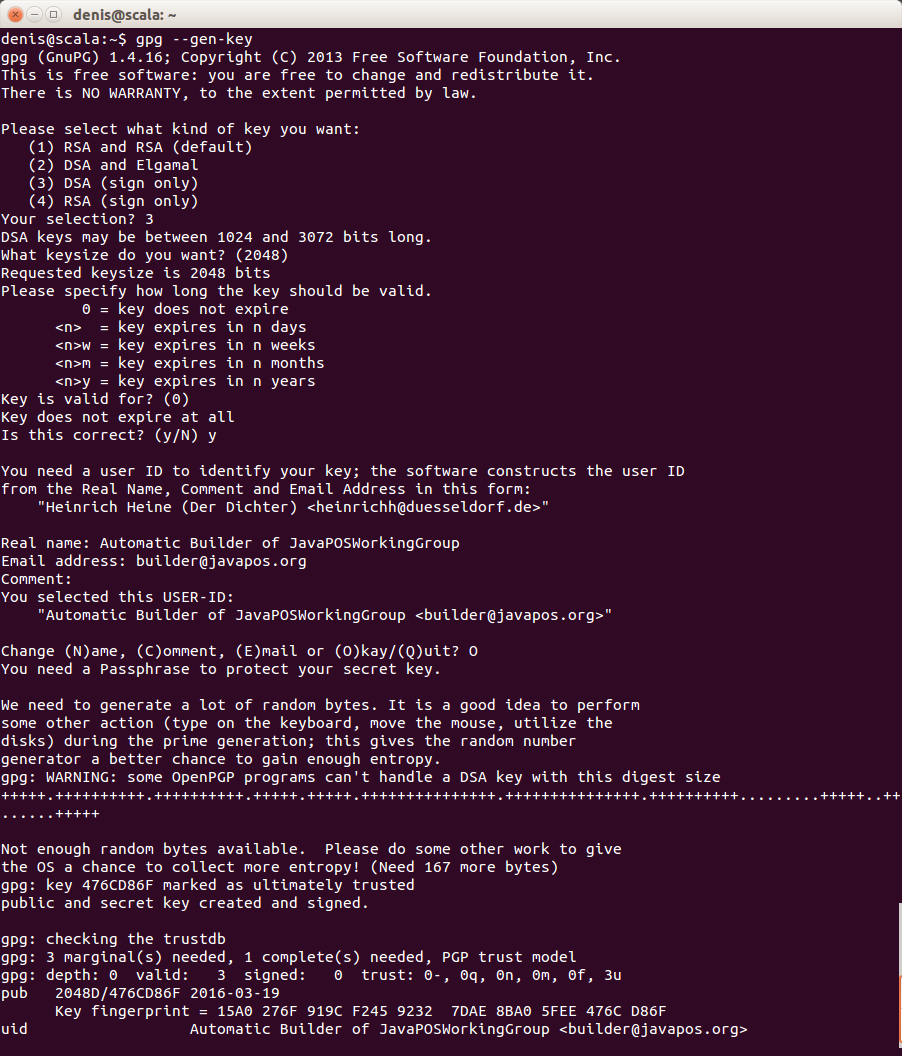
For that, we need to generate a pair of public and private cryptographic keys. The easiest way to do that is using the Linux command line tool gpg. Fortunately, I’m developing under Linux. The command line for generating a new pair is
gpg --gen-key
which will guide you trough the key generation, interactively. During this process you must be prepare to enter some names which should be chosen judicious.
- Your organization’s real name.
- An email address of our organization which is related to the context of building libraries. This might be a generic one, e.g. builder@your-organization.org; but emails send to it should be caught by some one.
- A pass-phrase to protect your key pair from misuse. This is something like a password to your keys to avoid some one else, not authorized, is misuse them. In fact this pass-phrase is stored later on at Travis CI to allow digital signing through the Bintray service using the private key stored at Bintray.
From this gpg will create the generated key’s user ID. The pass-phrase will be requested to be entered in a special dialog box, not shown here.
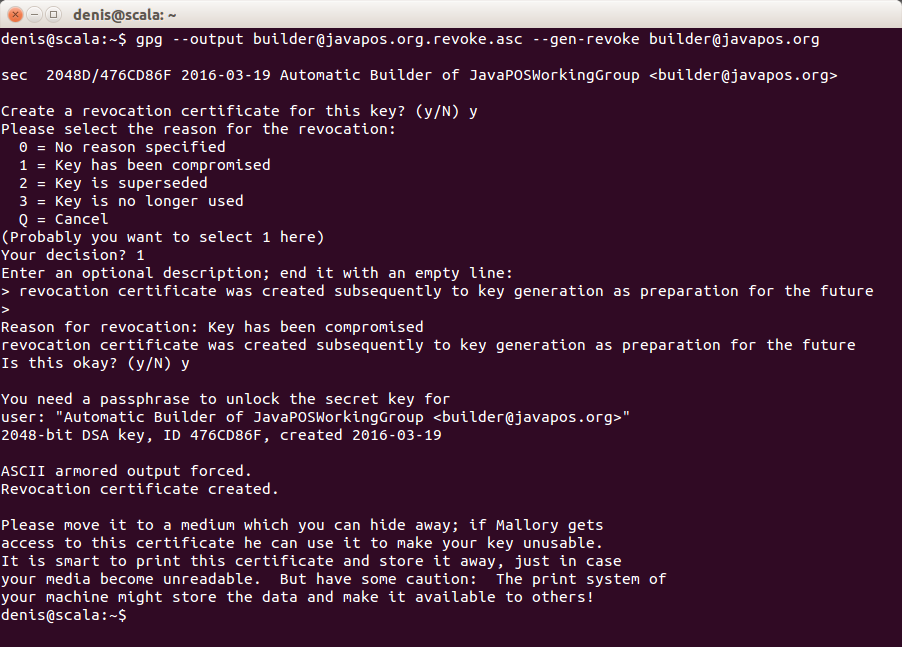
For being prepared for the future you should also create a key revocation certificate now. The command for that is
gpg --output revoke.asc --gen-revoke <your key ID>
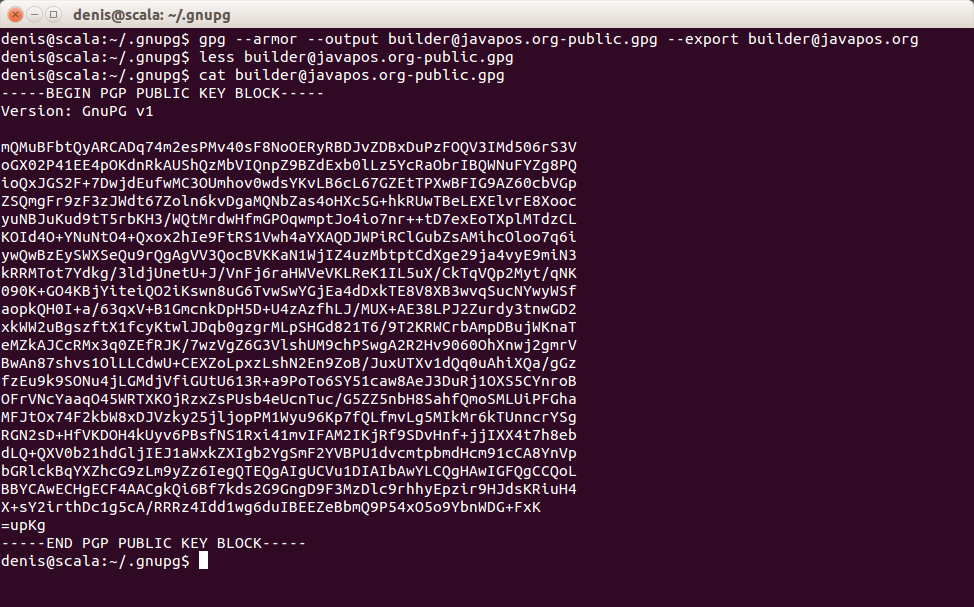
For storing the public and the private key on Bintray, you have to export them into an text file. Bintray needs it in an amored format
gpg --armor --output public.gpg --export <your key ID>
The command for the private key is similar:
gpg --armor --output private.gpg --export-secret-key <your key ID>
Be prepared to enter the pass-phrase when export is requested.
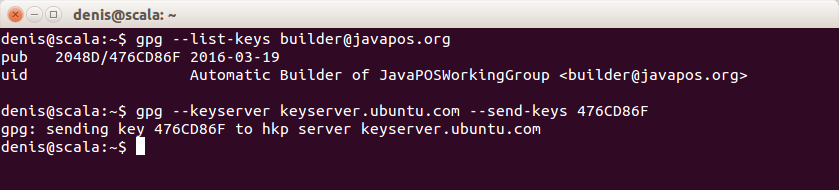
The last step is to publish the public key to a public key server. This key server will be queried later on by the Maven Central service when the library gets published to Maven Central repository to check the digital signature.
The gpg command for that is
gpg --keyserver <public keyserver address> --send-keys <your key ID>
On my side the key ID used for export did not work. I did not figured out why. So, I used the hexadecimal ID shown by the list-key command.
Note: Never use your ordinary cryptographic key pair, what you use in correspondences, for library signing. Even if the pass-phrase and the private key are stored at different service, Bintray and Travis-CI, some one who may have control over both, may compromise your keys! Just create a new one. You may have more than one key in use with gpg.
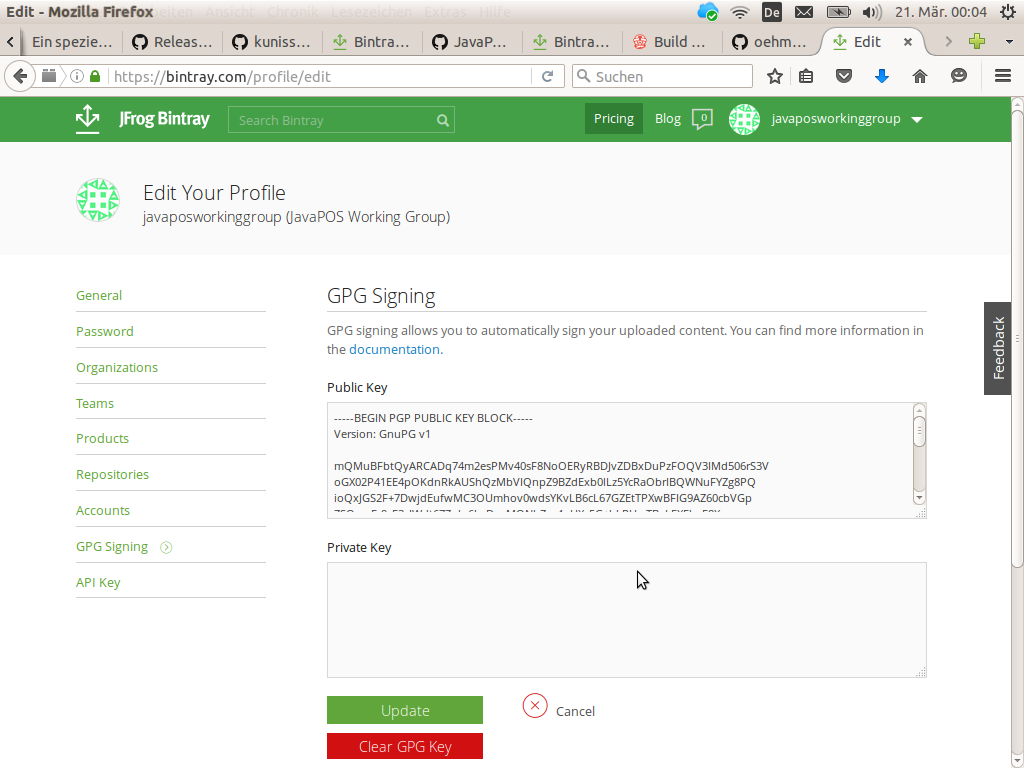
Both generated keys, the public and private one, now have to be added to Bintray.
Maven Central
To get a library published to Maven Central, at first a Jira account at Sonatype is required. Then you may create a New Project ticket. At this ticket you will need to state
- The group ID, the library will be published under. This is the most critical part, as this will be checked manually by a Sonatype employee. The ID must be unique and belonging to the requester. So, if it is a domain like “org.your-organization” you should be the owner of that domain.
- The GitHub project page.
- The GitHub source repository URL (ends on “.git”)
This is a on time task. You have it to do for your first library per group ID only. Subsequent libraries may published based on result of this first request.
You will get an e-mail answer when your request has been confirmed.
The Jira password is later required on Travis CI as Sonatype password for authorizing the library publishing to Maven Central.
Travis CI
The Travis CI service is tightly integrated with GitHub. After having logged in to Travis CI using GitHub authorization just synchronize your accounts on your accounts page (there is a button for that on the right upper corner under your profile name). Pushing this button will show all source code repositories of your organization from GitHub on Travis CI.
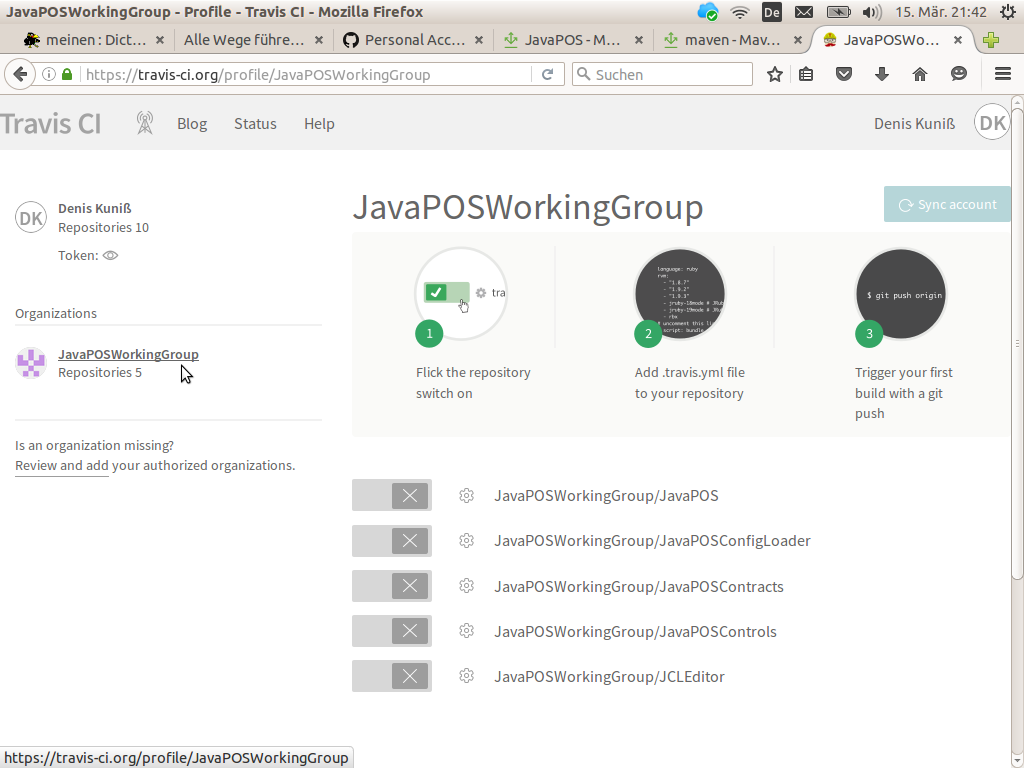
All repositories are disabled, currently. We will enable them project by project as each project needs its own configuration regarding Bintray API key and GPG pass-phrases and so on.
Enable the first project by pushing the project’s slider to the left, it becomes green. Click on the gear wheel right from the slider to get to the configuration page for this project.

At first, push the slider “Build only if .travis.yml is present” to the left, enabling it. This will avoid the project is being built on every GitHub commit as long as the project is not prepared for Travis CI.
Furthermore, we have to set two environment variables for better build experiences. The slider “Display value in build logs” may be enabled here.
- Set TERM to dumb. This will shorten the logging output on Travis builds making it more readable.
- Set GRADLE_OPTS to ‘-Xmx1024m -XX:MaxPermSize=512m -Dorg.gradle.daemon=true’ (including the single quotes) to speed up Gradle builds.
At last, we have to set the pass-phrase for library signing, the Bintray API key as authorization for publishing to Bintray, and the Sonatype password as authorization for publishing to Maven Central. Ensure that the slider “Display value in build logs” is not enabled (what is the default); otherwise, the secret values would get visible in the build logs.
- Set ORG_GRADLE_PROJECT_bintrayApiKey to the value copied from the API Key page on the Bintray profile.
- Set ORG_GRADLE_PROJECT_signingPassword to the pass-phrase the digital key pair was created with.
- Set ORG_GRADLE_PROJECT_sonatypPassword to the password the Sonatype account was registered with (the Jira password).
Don’t forget to put your configuration values into single quotes (as on GRADLE_OPTS) if your passphrases or passwords contain empty spaces. Also, bash special characters like ‘\’ or ‘&’ has to be escaped becoming ‘\\’ or ‘\&’. Otherwise the Travis system will not forward them correctly and the build will fail.
Gradle Build
Not a lot left now before automatic building and publishing can start. The build logic has to be put in place. At first, add the reference to Stefan Oehme’s sobula Gradle plugin to the build script.
plugins {
    id 'java'
    id 'com.github.oehme.sobula.bintray-release' version '0.6.7'
}
Now add your publishing configurations to the build script.
group = "your.sonatype.registered.group.id"
description = "Your cool project description"

contacts {
    "builder@your-organization.org" {
        moniker "Your Organization's Name"
        roles "owner"
        github "yourOrganizationsGithubUsername"
    }
}

bintray.user = "yourOrganizationsBintrayUsername"
bintray.pkg.version.mavenCentralSync.user = "yourSonatypeUsername"
The group definition must be set to the group ID requested for Maven Central. Under contacts you may enter the email address used for creating the cryptographic key ID. The moniker is the human readable name of your organization. The roles definition should be set to owner. The other definitions are self-explanatory, I guess. For an example, see this build.gradle file.
The last steps before your project gets automatically built are the following ones.
- Add a file releaseOnTag.sh to a subdirectory .travis in your project. The content of this file is the same for all projects.
- Add a file travis.yml to the root of our project. The content of this file is normally the same for all projects if you follow a standard project directory structure. It contains some configurations for the Travis CI runtime system. And, it calls the prior added releaseOnTag.sh file.
Ensure, file executable permissions for the file releaseOnTag.sh has been set; otherwise the Travis-CI server will not be able to execute this script. On Linux this is quite easy to be achieved on the command line
chmod +x releaseOnTag.sh
as well as on the Eclipse’s resource dialog for this file. However, on Windows this is quite a challenge as neither on the command line nor in Eclipse it can be done. You have to use any git client for that:
git update-index --chmod=+x releaseOnTag.sh
Your next commit to GitHub, after these changes, will force the first build of your project on Travis CI. From now on, every commit to GitHub will force an automatic build on Travis CI.
Even pull requests from other developers to your project will trigger automatic builds of this pull request on Travis CI. So, you will see immediately whether pull request builds and all test has been passed. This is really productive!
License
An important thing to get it work must not be forgotten: You have to put an open source license file with name LICENSE in the root of your project. This file is processed by the sobula Gradle plug-in to figure out the license, the project is treated under. For Bintray and Maven Central any project hosted there must have an open source license.
The sobula Gradle plug-in currently supports the following open source licenses:
- Eclipse Public License, Version 1.0
- The MIT License
- Apache License, Version 2.0
- GNU General Public License Version 2, June 1991
- GNU Lesser General Public License Version 2.1, February 1999
- GNU General Public License Version 3, 29 June 2007
- GNU Lesser General Public License Version 3, 29 June 2007
- GNU Affero General Public License Version 3, 19 November 2007
- Common Public License (CPL), V1.0
Choose one of them and download the license file from the given links. The sobula Gradle plug-in expects a text file; do not use HTML files. If the license you need is not supported, just fork the project, add your license under License.java and start a pull request Don’t forget the unit tests!).
Publishing
However, no release is published yet to Bintray and Maven Central. For that, you have draft a release on GitHub. This will force a build on Travis CI with a subsequent publishing of your library to Bintray if the assemble task itself worked well. The publishing to Maven Central, however, will fail for the first time as your library must be added to Bintray’s jCenter before it can be automatically published to Maven Central.
For adding your library to jCenter, go to your library’s dash board on your organization’s Bintray profile. On the right side there is a menu item Maven Central. Hover over it to see the hover tag where is a link you may request your library to be linked to jCenter as precondition to be synced to Maven Central. This is a one time task and seems to require some manual effort on Bintray side. You will get an mail answer when it is confirmed. It does not need to be repeated for subsequent versions.
From now on your continuous integration is running in the cloud. The only thing you have to do is committing your code changes to and drafting release on GitHub to get your library published on Bintray and Maven Central.
So, there is no excuse anymore, why an open source project does not have a continuous integration pipeline in the cloud …